To make my cards, I started with a 3.75 x 5 inch pieces of white cardstock. I took a Hero Arts background stamp, and stamped it in Distress Ink. Using the Classic Fabric background stamp by Hero Arts, I used Versamark on the stamp, added my stamped paper over top, then clear embossed. Once the embossing was dry, I used various Distress Inks to cover the areas that weren't resisted by the embossing powder. Once I was happy with the distressing, I ironed off the EP onto some scratch paper ( I used computer paper.. cheaper than cardstock). I stamped (the image) by Hero Arts onto the cardstock (cut/punched out) the image, and added a sentiment. With the myriad of Distress Inks I used, I ended up with three very different cards, but I like them all.
About Me
I am a new empty nester, and I love to make cards and ATCs. I am always looking for ways to use the product I have, to learn new techniques and ways to do things, and most of all, to have fun with the creating of my art.
Tuesday, May 17, 2011
Hero Arts Challengee May 14th
Monday, May 16, 2011
Publication reject cards
These two cards I did for the PaperCraftsMag Holiday Card issue, with quick and simple cards. These are easy cards to make, they only took me a bout 5 - 7minutes to make, once the idea in my head. For the top card, I started with some Cherry Cobbler cardstock (SU), cut, scored and folded to a standard sized card. I rounded all the corners on the cardstock. Taking some DCWV Luxury Stack cardstock in gold, I cut it to 3.75 x 5 inches for a mat on the base cardstock, again, rounding all the corners. I used a Quietfire Stamp (When This Christmas) and stamped it on white cardstock in Aged Mahogany Distress Ink. Using a Marvy 3 inch circle punch, I punched out the sentiment, and edged the circle in Wild Honey ink. I finished the card by mounting the sentiment on the gold mat with foam tape.
The second card might seem a tad familiar, since I've done this sketch a few times before. I just really, REALLY, love this sketch. I started with some So Saffron cardstock (SU) and cut it so the card measured 5.5 x 4 inches ( I trimmed a .25 inch off so that I could get three cards done with one strip of patterned paper). I used some Susan Wignet Christmas paper (Holly) and cut a 1.5 inch strip off the 12x 12 paper, cutting it at 4 inches, and adhered to the card base. Next, I took the stamp "Blessed is the Season" (Quietfire Design) and stamped it on the bottom of the card in Forest Moss Distress Ink. On some scrap white cardstock, I stamped the Ornament stamp (Hero Arts) in Aged Mahogany Distress Ink. I used a 2 inch circle punch from Marvy to punch out the ornament. I finished the card by foam mounting the ornament to the cardstock.
Labels:
Christmas card,
DCWV,
Distress Ink,
Hero Arts,
Quietfire Designs
Saturday, May 14, 2011
PDCC81
This is my entry for the PDCC81. I used a yellow green, dark purple and silver. I started by using a limish green card base, cut, scored and folded to a standard sized card. I had some silver and white DCWV cardstock, cut to 3.75 x 5 inches, embossed with a Craft Concepts Butterfly embossing folder. To this I inked the raised portions with Dusty Concord Distress Ink, then embossed with clear embossing powder and heat set. On white cardstock, I had stamped the Penny Black image (letters and flowers) in Dusty Concord Distress Ink, cut to size. I rounded the right hand corners of the white cardstock, silver cardstock, and card base. I adhered the silver layer to the card base with Sookwang tape. I added a bit of sheer white ribbon around the main image (Michaels), and used foam tape to adhere it to the silver layer.
My Hero Arts NSD Challenge card
This card I whipped up to meet the Hero Arts National Scrapbook Day challenge... last minute, of course. I started with a dark brown card base, and used two coordinating pieces of patterned paper, one for the scalloped edge, one for the background. Taking some fancy green cardstock, I punched 3 1.25 inch circles. I used the circular "Birthday Wishes" from the Hero Arts birthday set, and stamped it twice on white cardstock with Versafine Black ink. I punched out the Birthday Wishes with a 1 inch punch, then layered the Wishes onto two of the circles. I took some SU Pink Pirouette cardstock, trimmed it to 3.25 x 1.5 inches, rounded the corners, stamped the Envelope Pattern stamp in Spun Sugar, and adhered the plain circle with double sided tape. The Wishes on the right had one layer of foam tape, the Wishes on the left has two layers of foam tape on it. I used a 2.5 square of Pink Pirouette cardstock, rounded the corners, and stamped the Envelope Pattern stamp in Spun Sugar. I then took the big flower from Real Flowers, and stamped it in Victorian Velvet Distress ink.. I finished the card by adhering the pink cardstock piece to the card, on a diamond shape.
Monday, May 9, 2011
CAS-ual Friday and Lawnscaping Card
This card satisfies both the CAS-ual Friday and the Lawnscaping challenges this week. I was to do a text based card for CAS-ual Friday, and a Celebration card for the Lawnscaping challenges. I started with some blue based green cardstock (I think it might be the retired Glorious Green from SU), cut and folded to a standard sized card. Next, using some Basic Grey Kioshi paper, I cut it to 5 x 3.75 inches, and with Scattered Straw Distress Ink, stamped the Hero Arts Friend Definition on it. I took some scrap pale yellow patterned paper, and stamped the Dress ( LawnFawn) in Gamma Green Brilliance Ink. I took a red punch out that I had lying around, and trimmed some more of that yellow patterned paper to fit inside of it. I stamped Congrats (LawnFawn) in Gamma Green Ink. I added some red bling ( Recollections) to the middle of the dress. I used Sookwang tape and adhered the yellow scrap with the sentiment on it to the red punch out, then adhered the punch out to the patterned paper. I added some yellow sheer ribbon (Michaels) vertically to the card. I adhered the patterned paper to the card base. I used some foam tape to attach the dress to the card.
This card could be used as either a new job, graduation, or engagement card.
The Play Date Cafe Challenge 80
With the colours as red, orange and white, I did this weeks Play Date Cafe Challenge (#80). I started with a white card base, cut and folded to a standard sized card. Taking some scrap orange cardstock, I used Tim Holtz's Distress Ink in Dried Marigold, and stamped the Envelope Pattern stamp (Hero Arts) on the cardstock. I rounded opposite corners. I used some white cardstock, and stamped the Letters and Flowers stamp (Penny Black) in Barn Door Distress ink. I rounded the two corners that were opposite the orange rounded corners, and adhered the white cardstock to the orange cardstock piece.. I took some sheer red ribbon (Michaels) and wrapped it around the orange cardstock, and tied a knot. I then taped the orange layer to the white card base. As a finishing touch, I added 5 tiny bling (Recollections) on the right hand side.
Tuesday, May 3, 2011
Thank You Card
There is a family that has kind of taken over for us as "parents" for my youngest, who is across country in university. Since they have been so wonderful, I thought I could send them some cards to use, as well as a thank you card. This is the Thank You card. With SU Certainly Celery cardstock, cut and scored to a standard sized card, portrait style. I took some Basic Grey Kioshi patterned paper, and cut it to a .25 inch smaller than the base cardstock, and rounded the bottom corners. Using Tim Holtz's nature Elements mini stamps (Stampers Anonymous) I stamped the weed three times in Forest Moss Distress Ink. I stamped the butterfly from the same set in Walnut Stain Distress ink once on to the patterned paper, then stamped it again on a scrap of the patterned paper. I cut out the butterfly on the scrap paper, and foam mounted it right over where the butterfly was above the weeds. I used a Hero Arts stamp "Merci" from the Paris clear set, and stamped that in Walnut Stain Distress Ink. I took some polka dot ribbon (Michaels) and wrapped it around the paper, tying a knot just off centre to the left. I finished the card by adhering the patterned paper to the card base, and rounded bottom corners on the base card stock.
Labels:
Basic Grey,
Distress Ink,
Hero Arts,
Stampers Anonymous,
Tim Holtz
Monday, May 2, 2011
One of my friends got some Craft Concepts Embossing Folders, and I was blessed enough that she ran a few pieces of cardstock through it for me. This card is the result of one of those run throughs. I used some DCWV cardstock from "The Four Seasons" pack (it's the Love scrapbook page) and cut it to just under standard cardstock size. My friend ran it through the "wings" embossing folder (at least I think that's the correct name). I rounded the corners, then I decided to highlight the butterflies by rubbing Tattered Rose Distress Ink all over the raised areas. Using some SU Victorian crochet lace, and Victorian Velvet Distress Ink, I inked up a piece of the lace, and adhered it to the butterfly layer. I used another die cut for the flower (or was it a punch?? can't remember) and punched out a flower in pink Bazzil bling. I attached the flower to the card by using a button brad in cream. To add the sentiment, I took some white cardstock, rubbed it with Tattered Rose Distress Ink, then stamped the sentiment (Inkadinkado) in Victorian Velvet. I put the butterfly layer onto the red card base, and I rounded the corners on the red cardstock.
Labels:
Craft Concepts,
DCWV,
Distress Ink,
Inkadinkado,
SU
Sunday, May 1, 2011
PDCC79 AND FTL138
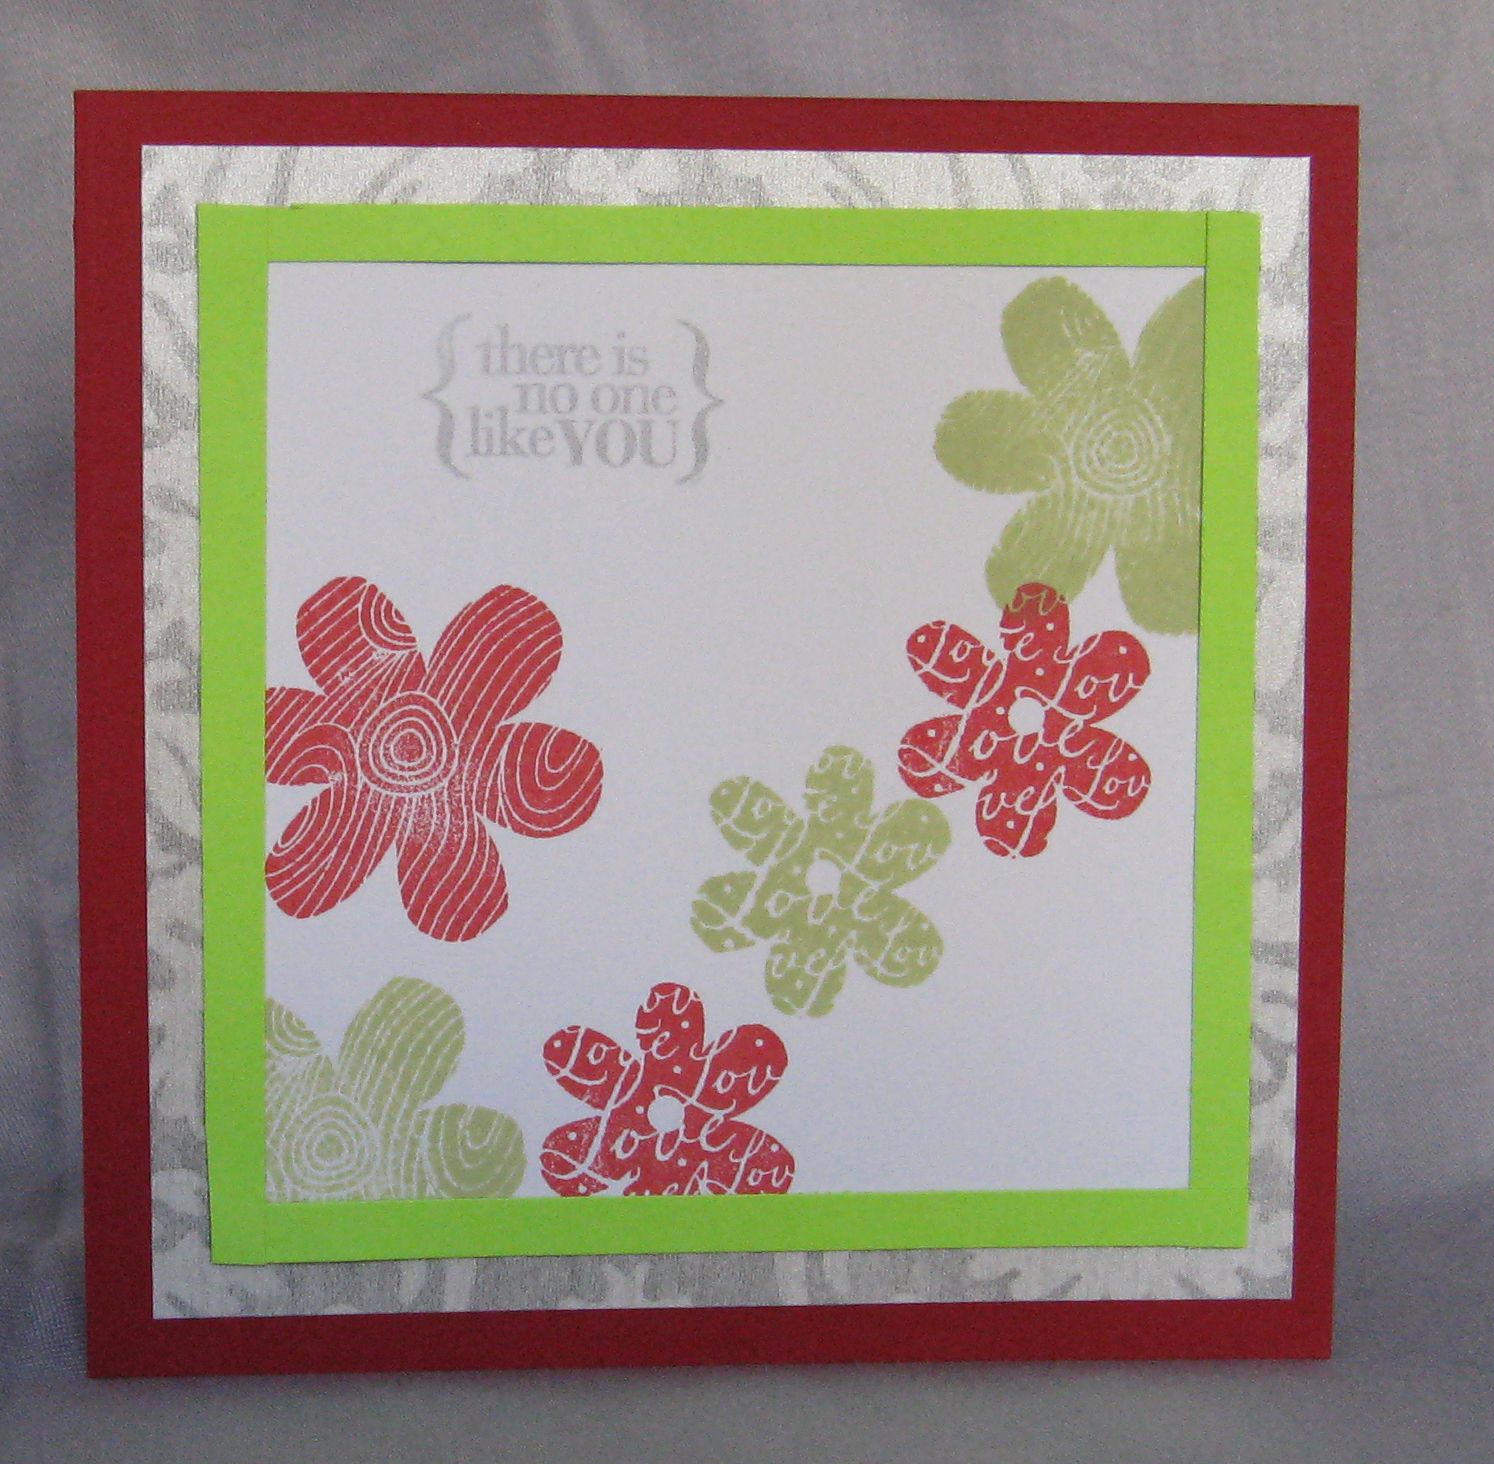
For this card, I combined the Play Date Cafe Challenge 79 and Clean and Simple Stamping FTL 138 challenges. I used the Play Date Cafe colours ( grey, lime and red) and the sketch from the Clean and Simple blog ( FTL 138). I started with a 5.5 x 5.5 inch square red cardstock base. Taking some leftover DCWV silver and white cardstock, I cut it to 5 x 5 inches and layered it on the red cardstock. I took a 4.5 x4.5 inch piece of white cardstock, and stamped flowers from Hero Arts Printed Flowers set, in Shabby Shutters Distress Ink and Barn Door Distress Ink (the Shabby Shutters was the closest ink I had to lime green), in the pattern on the sketch. Using some Colorbox silver pigment ink, I used the sentiment (Hero Arts) and stamped it in the area of the sketch. Once the pigment ink was dry, I took some .25 inch pieces of lime green cardstock, and framed the white cardstock with it.
Labels:
DCWV,
Distress Ink,
FTL 138,
Hero Arts,
PDCC79
Woo Hoo!! It's been a YEAR already!!
Wow, I knew my one year of blogging day was coming up, but I've passed it by almost a month!! LOL! I just want to say a HUGE THANK YOU to everyone who checks out my blog. I am not big on keeping stats, as this is my personal, share artwork blog, but seeing your comments really makes my day. I just hope I can take what I've learned in the past year, and make my blog even better :D
Make it and Mail it Challenge 1 Card
Lisa Spangler is having a make it and mail it challenge, and here is the card I did. I also wanted to do the Hero Arts Layering Stamps challenge for April, but I wasn't able to get it photographed and uploaded in time for that challenge. I started with a white card base, cut and scored to a standard sized card. I took some DCWV LUXURY cardstock in black and white, cut it to being 5.25 x 4 inches, and rounded opposite corners. With some Cool Caribbean scrap cardstock, I cut it to size and rounded the corners that were opposite to the black cardstock. Using white cardstock, and Tumbled Glass Distress Ink, I stamped Hero Arts Antique Letter Writing on the cardstock. I used Versafine Black Onyx ink to over stamp Large Blossom (Hero Arts) on the white cardstock. I went and rounded the opposite corners again. then layered the stamped panel to the Cool Caribbean panel to the black cardstock panel to the white card base. To finish the card, I used some Autumn Leaves Chipboard Letters to write "for you" on the card. This card is the one I am mailing on Monday to my birth mother in Ontario.
May Christmas Card Challenge
This is May's Christmas Card Challenge: use flower(s) on your card. There is no specific flower you need to use, just as long as there is a flower on the card. For my cards, I started with a grey cardstock, cut and scored to a standard sized card. I added a strip of patterned paper to the right hand side of the cardstock, and stamped "Merry Christmas" (Hero Arts) along the bottom of the card. The flower, a poinsettia, is a die cut from Quickcutz, if my memory is correct. A friend has this die, and I was able to cut several poinsettias from the die on Pink Pirouette cardstock.
Labels:
Christmas card challenge,
Hero Arts,
poinsettia
Tuesday, April 26, 2011
Penny Black Challenge: Lucy's Lovely Lines
This is my entry for the Lily Pad challenge "Penny Black - Lucy's Lovely Lines". I started with Kraft cardstock, cut and scored to standard card size. I used the 1/2 inch rounder on the Corner Chomper and rounded all corners. I then took some patterned paper (WalMart) and cut it to 3.75 x 5 inches and rounded the corners. I took some harlequin patterned paper, rounded the corners, and stamped the Penny Black stamp (Letters and Flowers) in Broken China Distress Ink, then adhered it to the light green patterned paper. Using some sheer white ribbon (Michaels) I tied a knot in the front of the harlequin paper, around the light green paper. I adhered the patterned paper panel to the card base.
The Play Date Cafe Challenge #78
This is my card for the Play Date Cafe Challenge #78. I wasn't sure if my blue was close, but it looks like it... I started with Regal Rose SU cardstock, and stamped Antique Letter Writing (Hero Arts) using Victorian velvet Distress Ink. I layered some butterfly patterned paper in blue on the left hand side of the card. I took some white scrap cardstock, and stamped the flowers (Penny Black) in Barn Door Distress Ink. I edged the white cardstock with the Barn Door Distress Ink as well. With a scrap of the blue patterned paper, I used a SU punch, and punched out the label, stamped the sentiment (Hero Arts) in Victorian Velvet Distress Ink, and also inked the edges with the same ink. I adhered the white panel to the base cardstock, then foam mounted the sentiment.
Labels:
Distress Ink,
Hero Arts,
PDCC78,
Penny Black,
SU
Monday, April 25, 2011
Joy's Giveaway!!
Joy is having a giveaway HERE to celebrate having 100 followers. You need to comment on her blog post each day to win :) Good luck!!
PS- I made some cards on the weekend, I just haven't been able to photograph them yet and upload them.. Hopefully I'll get that done tonight or tomorrow :)
Thursday, April 21, 2011
LawnFawn
I got my first set of LawnFawn stamps late last week, and Tuesday was the first day I had to play with it. I had won the Lunar Lights set, and I've heard so much good about LawnFawn that I was eager to play with the stamps.
For the butterfly ATC, I was doing a Oh Canada! theme, and the flourish and butterfly stamp are Quietfire Design. However, I didn't have a Quietfire stamp that was short enough (height wise) to fit in the space for the sentiment, so I used LawnFawn's "Shine Brightly" sentiment from the Lunar Lights set.. Let me tell you, I was very impressed with the clear, crisp impression of the LawnFawn
stamp. I did wonder if I was just lucky, or if it was really as great as the first stamping. I didn't take long to find out.
For the second ATC, I was making my Christmas ATCs, and I wanted to paper piece my present. I took the box from Lunar Lights, and stamped it on patterned paper. It stamped like a dream. And the bow that came with the Lunar Lights set did well too. Safe to say, I'll be buying more LawnFawn in the future. With this ATC, I stamped the star from Hero Arts in Shabby Shutters Distress Ink randomly over the grey/beige cardstock. I layered a piece of DCWV cardstock from "The Four Seasons" over top, then I foam mounted my paper pieced present on the snowflake cardstock. I stamped "Noel" (Unknown company) in the bottom right hand corner.
Labels:
challenges,
DCWV,
Distress Ink,
LawnFawn,
Quietfire Designs
Wednesday, April 20, 2011
ATC Crazy!!
Well, Tuesday was stamping day for me ( a group of us in town here meet weekly to stamp and share ideas, and supplies :D). I haven't touched making ATCs for a while, simply because there are so few swaps that I'm involved in.. it's sad, but on one group I'm in, I am the ONLY ATC swap going. However, a friend of mine hosts a vintage collage ATC group, and I am blessed to be a part of it. So, I decided I was going to catch up, and try and get most of the year finished yesterday... not hard when I have some Tim Holtz stamps to play with, that I hadn't even inked up before yesterday.
For the first ATC, I took some pale pink patterned paper (close to Tim's Tattered Rose colour), and added a strip of Nostalgia tissue tape to it. I then stamped the image over both the patterned paper and the tissue tape with Onyx Black Versafine ink. I finished the ATC with 3 gems in pale pink in the upper right hand corner.
The second ATC was done on some cardstock I had. I was playing with my Distress Inks one day, and made a sheet of distressed blue cardstock. I added some shimmer to it with the Tsukinenko shimmer spray. I stamped the image in Majestic Blue Versafine, and finished the ATC by sponging some Memories Soft Peach ink on the ATC.
The car ATC was fun to do. I had some travel patterned paper that I had no idea what to do with, so I cut it to ATC size, put it on some cardstock backing, and stamped the image in Vintage Sepia Versafine. I was going for a masculine feel for this ATC (for Father's Day), so I didn't add anything else to the ATC.
The Fourth ATC was done on some Distressed Yellow cardstock.. I had just randomly stamped some yellow Distress Inks on some acetate, misted with water, and laid the cardstock on it. It needed a punch, so I just randomly stamped some Wild Honey Distress ink in places and spritzed with water. Once it was dry, I stamped the image in Versafine Vintage Sepia. I sponged some Memories Soft Peach ink on the edges of the ATC, and completed the ATC with some fun fibre that I had lying around.
The Tattered Sparrow ATC (the only name I can remember :)) is just the Tattered Sparrow stamped in Versafine Vintage Sepia over some WalMart patterned paper backed on to some cardstock.
Please pardon the photos.... I am having issues with my camera not staying in focus, and I tried to photograph the images with a fabric backing.
Thursday, April 14, 2011
CAS Card
I wanted to do a CAS card, so I used a chocolate brown card base, cut and scored to a standard sized card. I cut some pale yellow patterned paper (WalMart) to 3.75 x 5 inches. I took my flower stamp (Inkadinkado) and stamped it in Walnut Stain Distress Ink. I really wanted the flower to be the focal point of the card, so I used Mustard Seed Distress Ink to stamp the sentiment (Hero Arts). To make the card even softer, I rounded all the corners of the card base and patterned paper. I used some yellow ribbon (Michaels), wrapped it around the patterned paper, and tied a knot. Then I adhered the patterned paper to the card base. To finish the card, I added 5 yellow gems.
Wednesday, April 13, 2011
Crazy 4 Challenges 82 card
This is the card that I did for Crazy 4 Challenges week 82, which was the colour challenge Brown, Green and Vanilla. I started with a chocolate brown card base, and cut some pale moss green and vanilla patterned paper to 4 x 5.25 inches. Using a Tim Holtz stamp, I stamped the butterfly 3 times on the patterned paper, using Forest Moss Distress Ink. I rounded the bottom corners on the card base and patterned paper. Taking a small vanilla panel, I rounded the bottom corners, and stamped “Thinking of You” (Hero Arts) in Forest Moss Distress Ink. The card needed some dimension, so I stamped the butterfly again twice, once on vanilla scrap and once on the patterned paper, and cut them out. I adhered the vanilla panel to the moss and vanilla panel. I used some sheer chocolate brown ribbon, and ran a piece across the front of the patterned paper. The card still needed a little something, so using a light brown button and some linen thread, I wrapped the thread around the sheer ribbon, through the button, and tied a knot in it. I taped the bodies of the cut out butterflies to the bodies of two of the butterflies that I had stamped on the patterned paper. I finished the card with 5 tiny gems above the Thinking of You.
The Lily Pad - Kathy's Colour Thrown Down
This card is my entry for the Lily Pad Colour Throw Down. It was to use Lilac, Sage, Lime green, a bold yellow and a bold orange. I don't have much but cardstock in those colours, so I did something quite different for me. I took some 1.25 inch strips of cardstock in orange, yellow, sage green and lime green, and stamped different patterns on them. On the orange, I used the Envelope Pattern stamp (Hero Arts). On the lime green a leaf cluster from Delicate Clusters (Hero Arts). On the yellow, the Eiffel Tower from Paris (Hero Arts), and on the sage green French Script (SU). I then took the strips and cut them to .25 inch wide. I already had a lilac patterned paper piece on some Kraft cardstock from a card that didn't come together for me, so I used that as my base, and added the .25 inch strips, trimming to size. I stamped “Best Wishes” (Inkadinkado) in Dusty Concord Distress Ink. I tied the card all together with a lime green ribbon, tied in a knot at the top of the card.
Subscribe to:
Posts (Atom)